Need Dryer vent services
Contact | +1 (678) 649-0099
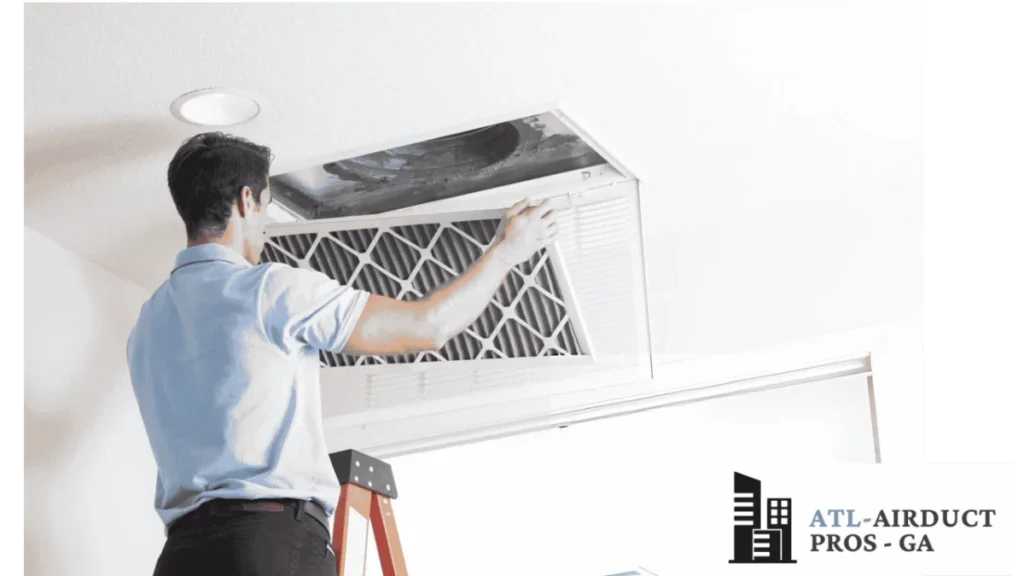
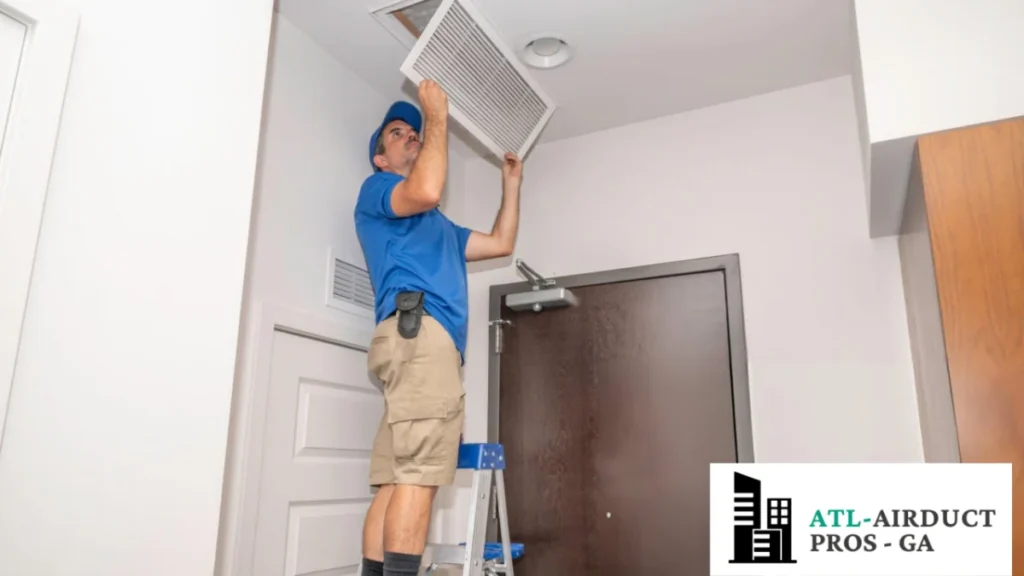
what is dryer vent cleaning
Dryer vent cleaning is the process of removing lint, dust, and other debris that slowly build up inside the vent duct of your dryer. Over time, every time you use your dryer, small particles of fabric and lint pass through the filter and begin to stick to the walls of the vent. If not cleaned, this buildup can block airflow, making your dryer work much harder, take longer to dry clothes, and even create a serious fire hazard.
Benefits of Dryer Vent Cleaning
Credits | Clean That up
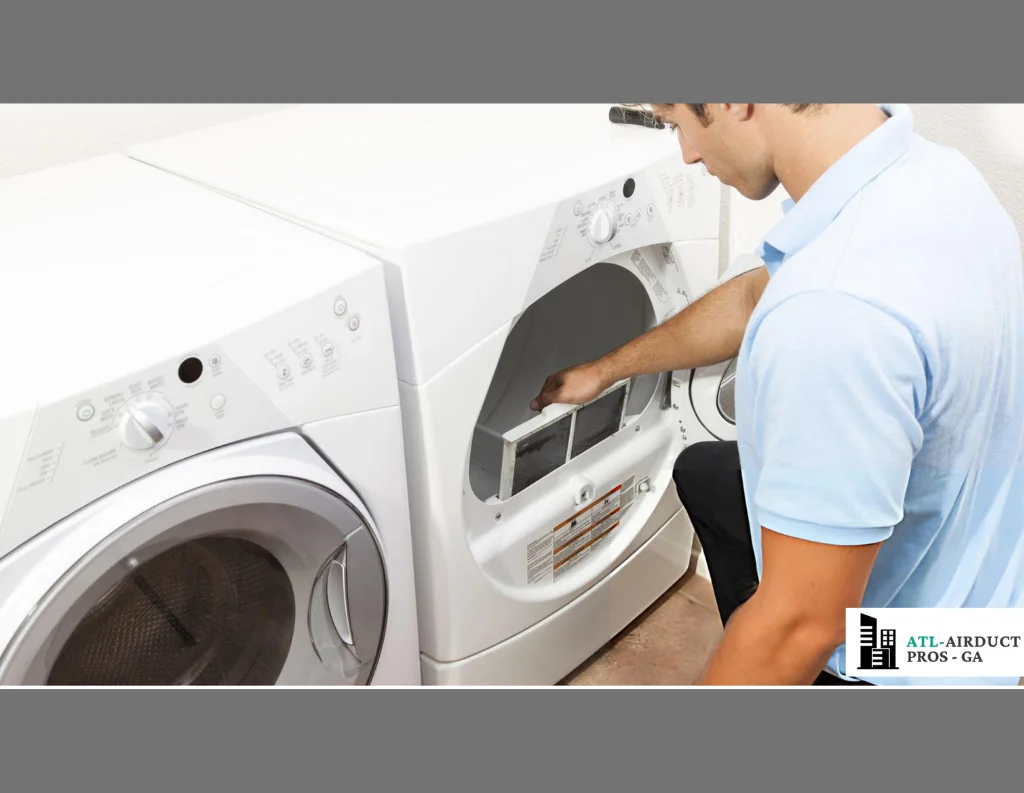
How We Clean Your Dryer Vent Duct – Step By Step – It’s Super Simple!
Hey everybody! In this guide, we’re going to show you how to clean your dryer vent duct. This is a job that most homeowners often neglect, without realizing that it’s actually a serious fire hazard.
All of the lint from your dryer can build up on the inner walls of the duct — all the way from the dryer to the outside of your home. When that hot air comes out of your dryer, it can ignite the lint and cause a fire. That’s why we’re showing you the proper way to get it completely clean. Let’s get started!
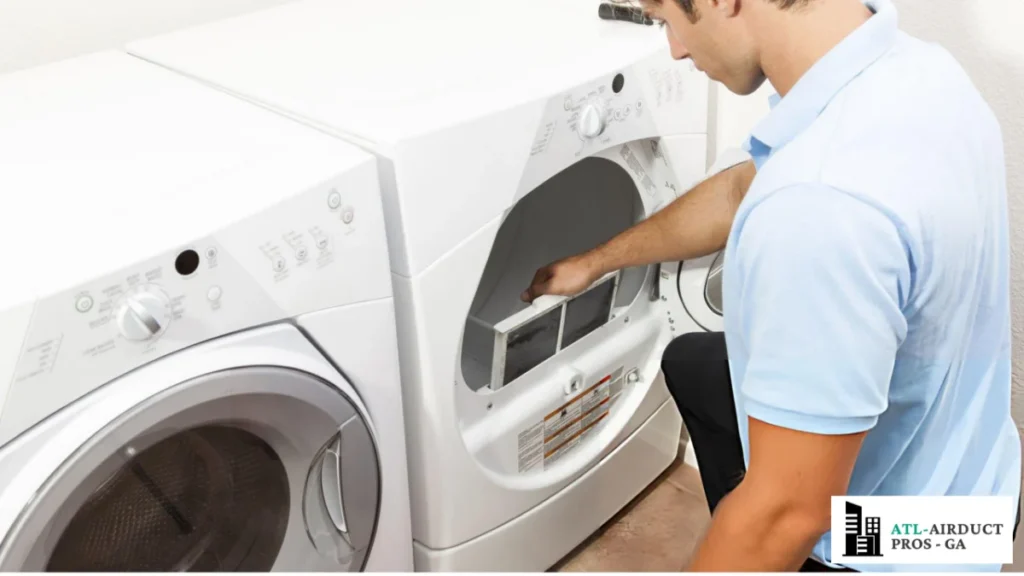
Photo Credit | Airduct Cleaning ATL LLC
Step 1: Don’t Forget the Lint Trap
The first thing to mention is that your dryer has a lint trap. It’s designed to catch a lot of lint before it gets into your ductwork, so make sure you clean it after every single load.
For example, we just did some laundry today and our lint trap is perfectly clean because we clean it every time. If you don’t clean yours after every load, check it now — you’ll probably see it’s full of lint. Keeping that lint trap clean is really important!
Step 2: Use the Right Dryer Vent Cleaning Kit
For the process, we use a dryer vent cleaning kit. The one we prefer comes with an adapter that connects directly to a shop vac. This makes the job much cleaner and prevents a huge mess.
Without this attachment, lint usually gets pulled out into your laundry room, backyard, or side yard — creating a mess. This little adapter makes the kit worth it, but you can use any kit that’s commonly available.
For example, Home Depot carries one for about 20 dollars, which comes with rods to help push through the vent.
Step 3: What’s Inside the Dryer Vent Cleaning Kit
If you’re on a strict budget, even a basic kit will get the job done. The kit usually comes with all the essential tools you need to clean your dryer vent effectively. Inside the kit, you’ll find an instruction manual that explains how to use each tool, a small cleaning brush for smaller vents or the dryer itself, and the main vent brush which is the primary tool for cleaning ducts.
Other helpful items included are:
Step 4: Preparing Your Dryer
Before starting, you need to identify whether you have a gas dryer or an electric dryer. If it’s a gas dryer, always turn off the gas supply before disconnecting anything. For an electric dryer, simply unplug it from the outlet and carefully move it away from the wall so you can access the back side.
Once the dryer is moved, you’ll notice two main things:
Both of these need to be disconnected. The duct is usually attached with a band clamp, which is just a metal strap tightened with a screw. Loosen the screw, slide the duct off, and set it aside.
Step 5: Disconnecting & Inspecting the Duct
The hardest part of dryer vent cleaning is usually working in the tight space behind the dryer. Once you disconnect the duct, take a moment to inspect the inside.
In our case, there was only a light layer of lint stuck to the walls, which wasn’t too bad. However, at another home we cleaned, the duct walls were completely caked with lint. Once lint begins to build up, the problem grows quickly—it can restrict airflow, make your dryer less efficient, and even create a serious fire hazard.
You should also inspect the flexible duct (the short duct connecting the dryer to the wall):
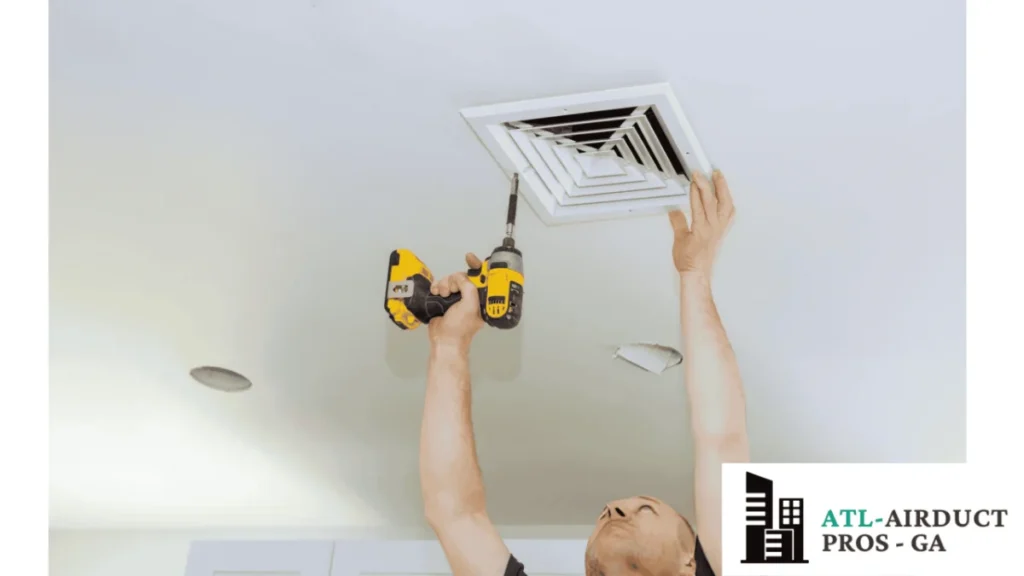
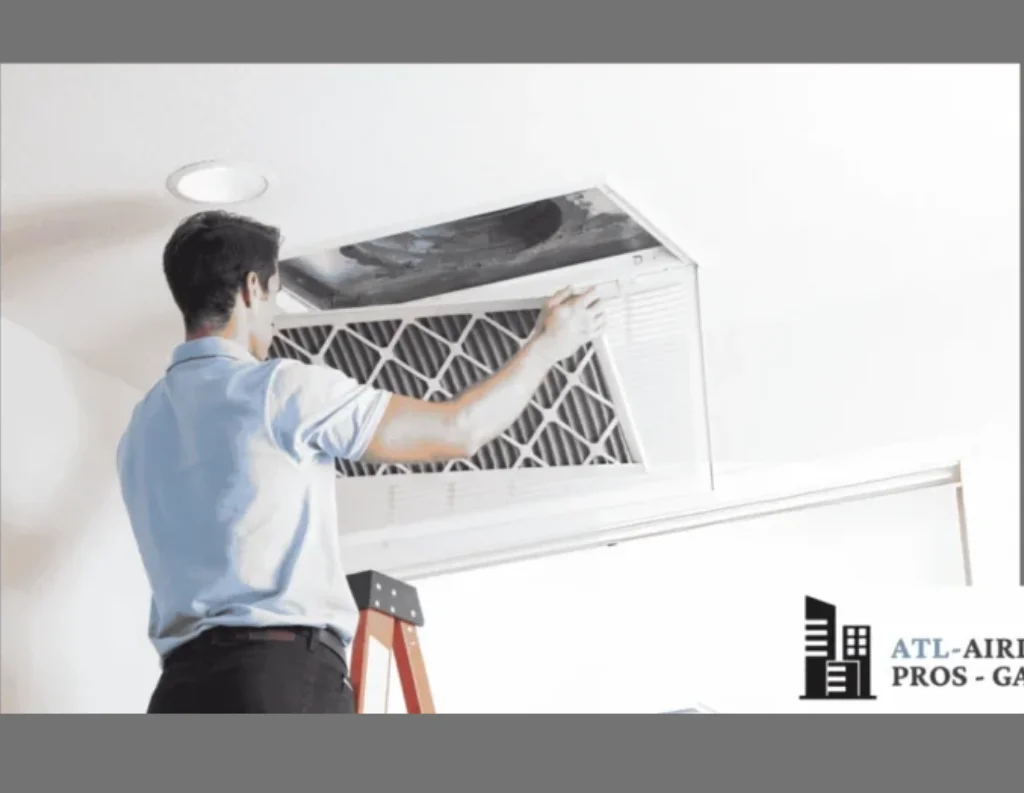
Step 6: Locate the Exterior Exhaust Port
Next, make sure you know where your dryer exhaust port is on the outside of your house.
Step 7: Exterior Exhaust Port Considerations
If your dryer vent exhaust port is easy to access, it’s best to remove it during the cleaning process so you can reach in from that side. In this case, we’re leaving it attached because it runs into a crawl space with other vents.
Keep in mind:
Step 8: Setting Up the Cleaning Rods & Brush
The cleaning kit comes with flexible rods that make it easy to clean through bends and turns inside the duct. These rods connect to your drill, giving the brush the power to spin and loosen lint effectively.
To prepare the kit:
The kit also includes a vacuum adapter with two holes. One hole connects to your shop vac, while the other is where the cleaning rods pass through. This allows suction and brushing to work together, pulling lint out as it’s loosened.
Step 9: Cleaning the Ducts Safely and Effectively
Now that everything is set up, it’s time to begin cleaning the dryer vent ducts. The brush, drill, and shop vac will work together to loosen and remove lint as you move deeper into the duct.
Start the cleaning process:
Once everything is ready, turn on the shop vac. Slowly spin the drill in a clockwise direction, while gently moving the brush in and out of the duct. Push a little deeper each time until the first rod is fully inside. When that happens, simply attach another rod and continue the same process — repeating until the brush reaches the exterior vent or pushes all the way out.
Step 10 : Removing Rods and Cleaning the Final Sections
Once the main cleaning is complete, it’s important to safely remove the rods and finish cleaning both the last section of the duct and the flexible duct connected to the dryer.
Removing the rods safely:
This “lather, rinse, repeat” method ensures all rods come out smoothly without getting stuck inside the duct. For example, at another home we cleaned, the tape tab made it simple to remove rods and kept the entire process safe and smooth.
Cleaning the last section of duct:
When you reach the final rod with the brush, pull it back until the brush bumps against the vent adapter. Shake it gently so the vacuum can suck up the last bit of lint. Then remove the brush, adapter, and vacuum all at once.
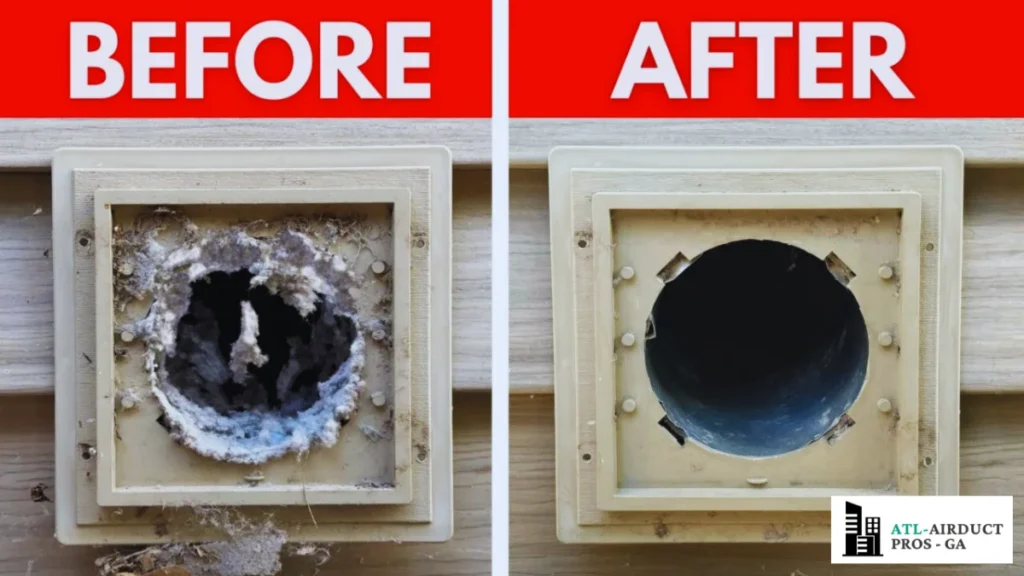
At this point, the indoor duct is completely clean. Even if it didn’t look too dirty at first, you’ll notice a huge difference compared to the before condition. Much of the hidden caked lint will now be gone, leaving the duct spotless.
Don’t forget the flexible duct:
The final step is to clean the flexible duct that runs from the dryer to the house. This part often has a surprising amount of lint buildup.
- Try to straighten the duct as much as possible before cleaning.
- Use the same cleaning process as before, but be gentle — flexible ducts can be fragile.
- If you have a plastic flexible vent, be extra cautious, as the brush can damage it.
- Also, remove the duct from the dryer itself so you can clean inside the dryer vent tube. Hold the shop vac hose in place with your hand and carefully guide the rod inside.
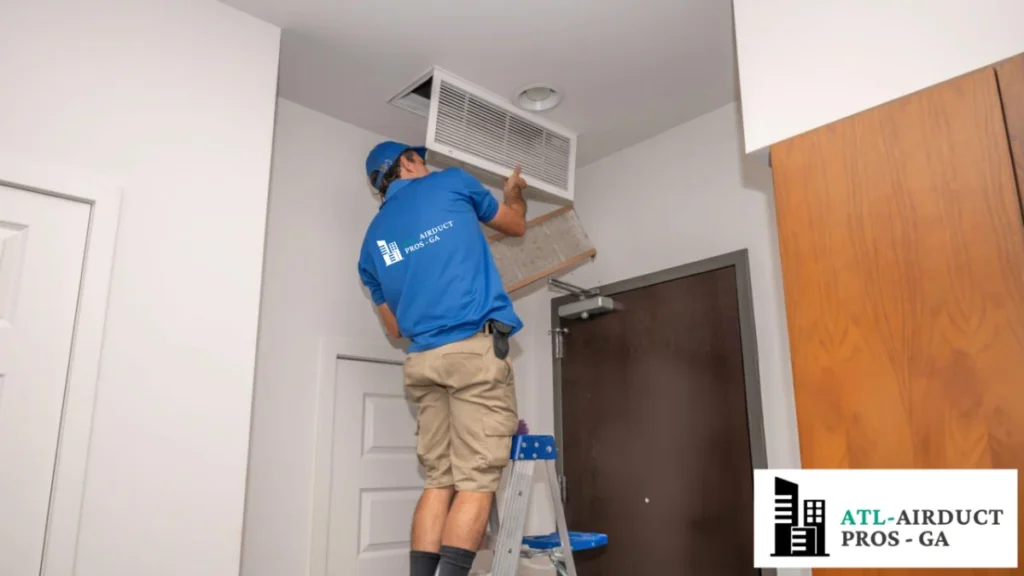
Step 15: Reassembly, Final Checks & Results
Once the cleaning is complete, the next step is to carefully reassemble everything and make sure the dryer is working properly. Start by reconnecting the flexible hose to the dryer and securing it in place. Make sure it’s seated fully over the flange before tightening the clamp. Then move the dryer back into position, but leave enough room to reconnect the other end of the hose to the wall duct.
Reassembly steps:
- Tighten the band clamp securely on the dryer side.
- Reconnect the hose to the wall duct and tighten that clamp as well.
- Plug the power cord back in.
- If you have a gas dryer, reconnect the gas line and turn the supply back on.
Once reassembled, it’s time to test. Run the dryer to check that it’s heating properly, then step outside to confirm air is venting smoothly through the exterior exhaust port. In this case, we also cleared around the vent to ensure there were no obstructions blocking airflow.
Final result:
And that’s it! The ducts are now fully cleaned, and your dryer will:
- Run more efficiently
- Dry clothes faster
- Be much safer, with a reduced risk of fire
Overall, the cleaning process isn’t too difficult—the hardest part is usually moving the dryer around. But once it’s done, the results speak for themselves: better performance, lower energy use, and peace of mind knowing your home is safer.
Indicators That Your Home Requires Professional Dryer Vent Cleaning
Before and After Dryer Vent Cleaning in Atlanta GA
Services we offer


7+
Years Of Experience
We’re Ready To Deliver Safer, Cleaner & More Efficient Drying – Dryer Vent Cleaning Done Right and Faster.
What people are saying
Fantastic service! My dryer is working so much faster and I feel much safer knowing the vent is completely clean.” “Professional, thorough, and quick—highly recommend this team for dryer vent cleaning in Atlanta!

Mack Mcguire
Santa Cruz, CA
“Very professional and efficient! The dryer vent is completely clean, and my dryer runs much better now.” “Excellent service—quick, reliable, and highly recommended for anyone in Atlanta needing vent cleaning. Amazing service really”

Ellyn Garzon
Rock, MI
Quick and professional service in Atlanta! My dryer vents are spotless, and it works much more efficiently now.” “Highly recommend this team in Atlanta—thorough, reliable, and very knowledgeable about dryer vent cleaning.

Nelson Bryant
Bangor, ME